 In the past few years, CANVA has become the most popular online design and publishing tool for individuals and businesses alike. The rise of social media has created an expectation for designs and images that capture the attention of followers and help your brand to stand out from the crowd. Thankfully, you no longer need to pay for an expensive and complicated Adobe subscription to keep your fans up to date. CANVA is by far the easiest and most cost effective tool I have used, and it seems that most vet clinics agree.
With that in mind, here are my Top 5 tips for creating veterinary posts that are simple, eye-catching and aligned with your brand message:
- Go Pro. At around $165 per year, CANVA Pro is well worth the investment if you’re posting regularly to your social platforms. With the ability to remove backgrounds on images and resize your designs at the touch of a button, these features can make designing a breeze.
- Add a logo watermark to your team and patient photos before publishing. This way, if your images are shared, your brand will be too. Use a high-res logo (png format with a transparent background) to overlay onto photos.

- Create a customised Brand Kit with your own colours and fonts to ensure that you deliver a consistent brand message. Try to use them in all of your posts—particularly for Instagram—to create visual appeal and a professional impression on your profile. It’s much easier to select brand colours from a palette than to have to memorise hex codes. This practice also helps to make your highlight reels look more professional (see my previous blog on Instagram Stories)
CANVA also has a new feature to help you create colour coordinated designs. Just select any photo, and choose “apply colours to page.” Canva will magically restyle your page so the colours complement your image. - Use the CANVA image editing tool to brighten, crop, or add filters to photos. Dull or dark photos make for dull posts. Check the background of your images for whiteboards, clients, blood etc. and either crop them out, add a strategically placed emoji, or use a blur graphic. If you need to post images of a graphic nature to illustrate a case, make sure you include a warning in the text of the post first.
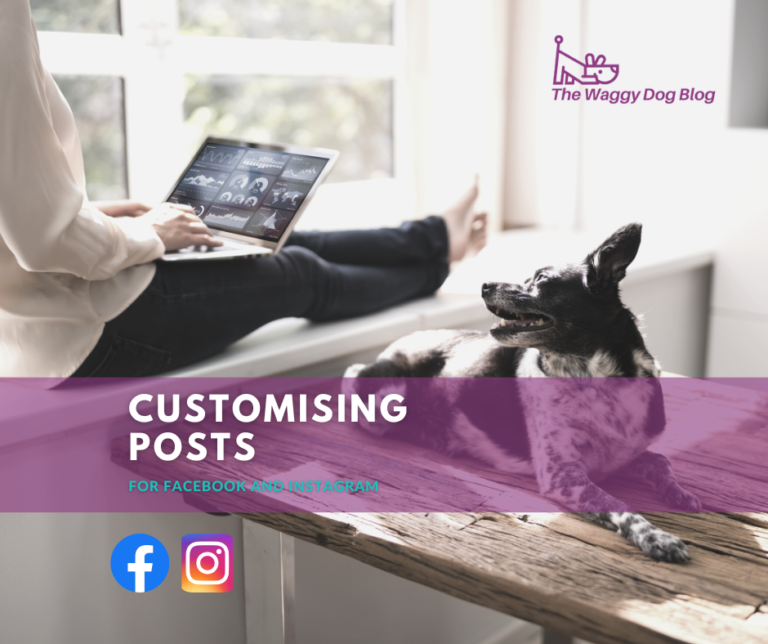
- Resize designs for Facebook and Instagram to prevent images being cropped incorrectly. This can make a huge difference to the presentation of your posts.
There are so many more tips I could write about, but I’m sure you have some too. I’d love to hear about your short-cuts and best practices for designing social media posts in CANVA. I’ll also be posting weekly tips on my Facebook, Instagram and LinkedIn pages, so if you haven’t already done so please Like and Follow my pages to get more helpful hints.